설치
1. 링크에 들어간다. (https://docs.anaconda.com/free/miniconda/index.html)
Miniconda — Anaconda documentation
These three commands quickly and quietly install the latest 64-bit version of the installer and then clean up after themselves. To install a different version or architecture of Miniconda for Windows, change the name of the .exe installer in the curl comma
docs.anaconda.com
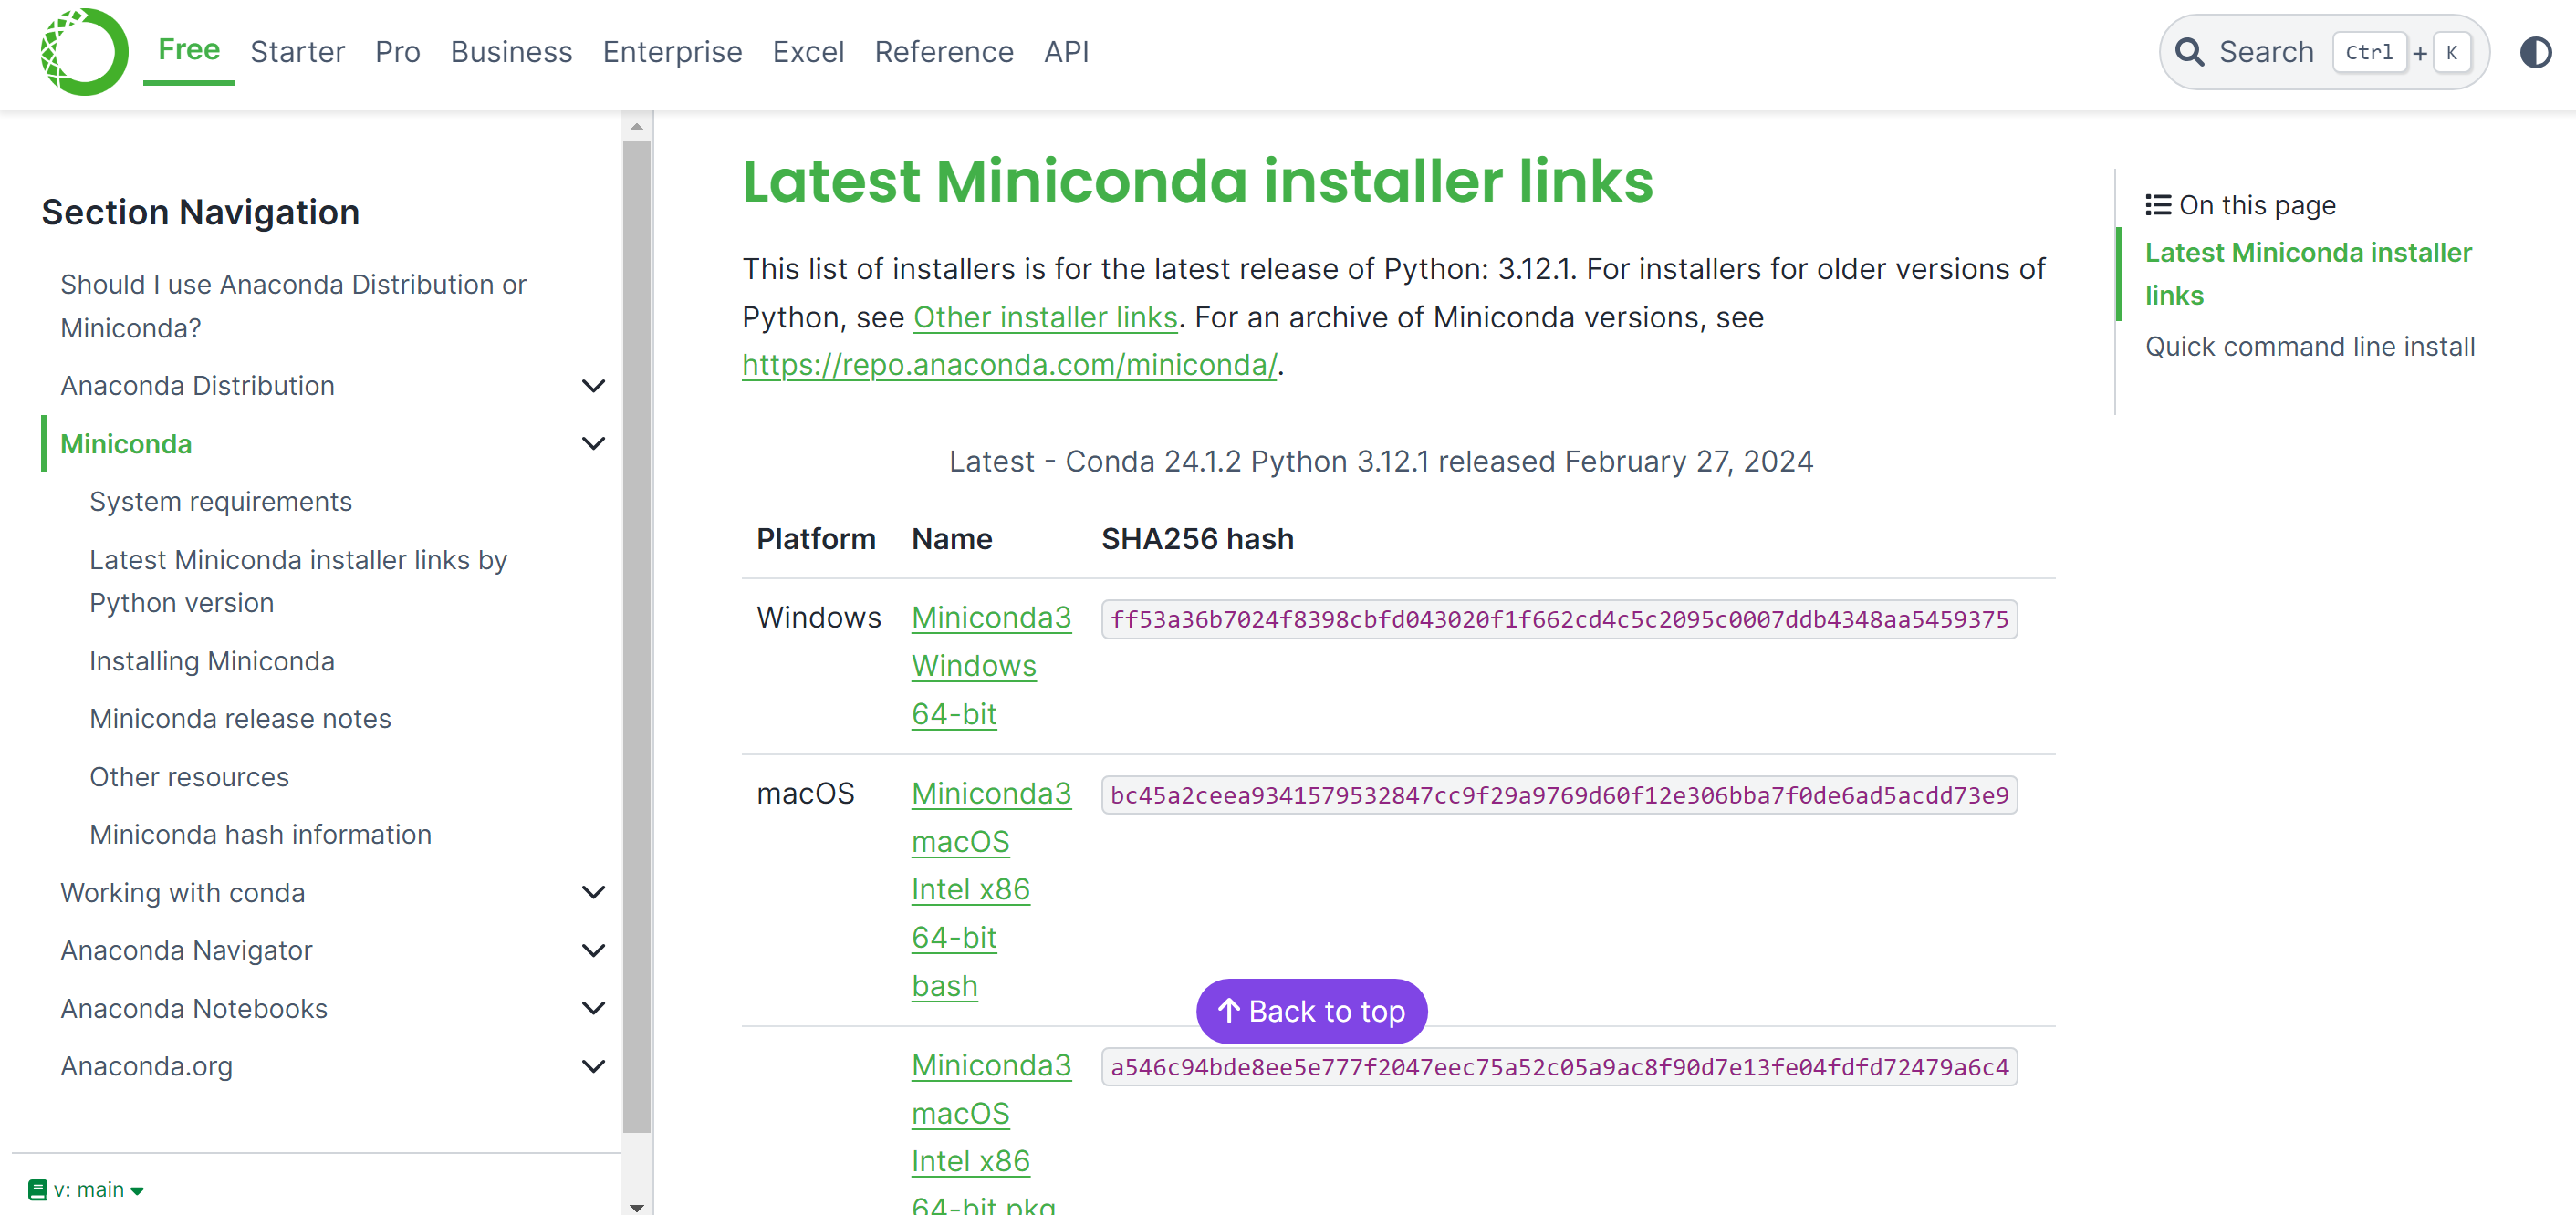
2. 링크에 들어가면 아래 페이지가 뜬다. Latest Miniconda installer links에서 자신의 OS와 bit에 맞게 installer를 설치한다.
3. 해당 항목에 체크한 후 install한다.

* Add Miniconda3 to my PATH environment variable에 나타난 경고 문구는 '자동으로 PATH환경에 변수를 추가할 경우, 다른 프로그램들과 충돌이 발생할 수 있다'이다. 작성자는 이미 VSCode, PyCharm, Spring Boot 등 다른 프로그램을 사용중이다. 충돌이 우려되는데, 연습용으로 설치하는 것이므로 일단 튜토리얼대로 그대로 진행하였다.
4. 설치가 완료된 후 윈도우 검색 창에서 mini를 검색하면 Anaconda Prompt (Miniconda3)가 검색된다.

5. 해당 프롬프트 창이 떴다면 설치 완료

conda 환경설정
1. 프로그래밍 툴들의 경우 대부분 경로에 한글명이 있으면 오류를 출력한다. miniconda도 마찬가지이다. 만약 계정이 한글명이거나 경로에 한글이 있을 경우, 영어로 변경해주는 것이 필요하다.
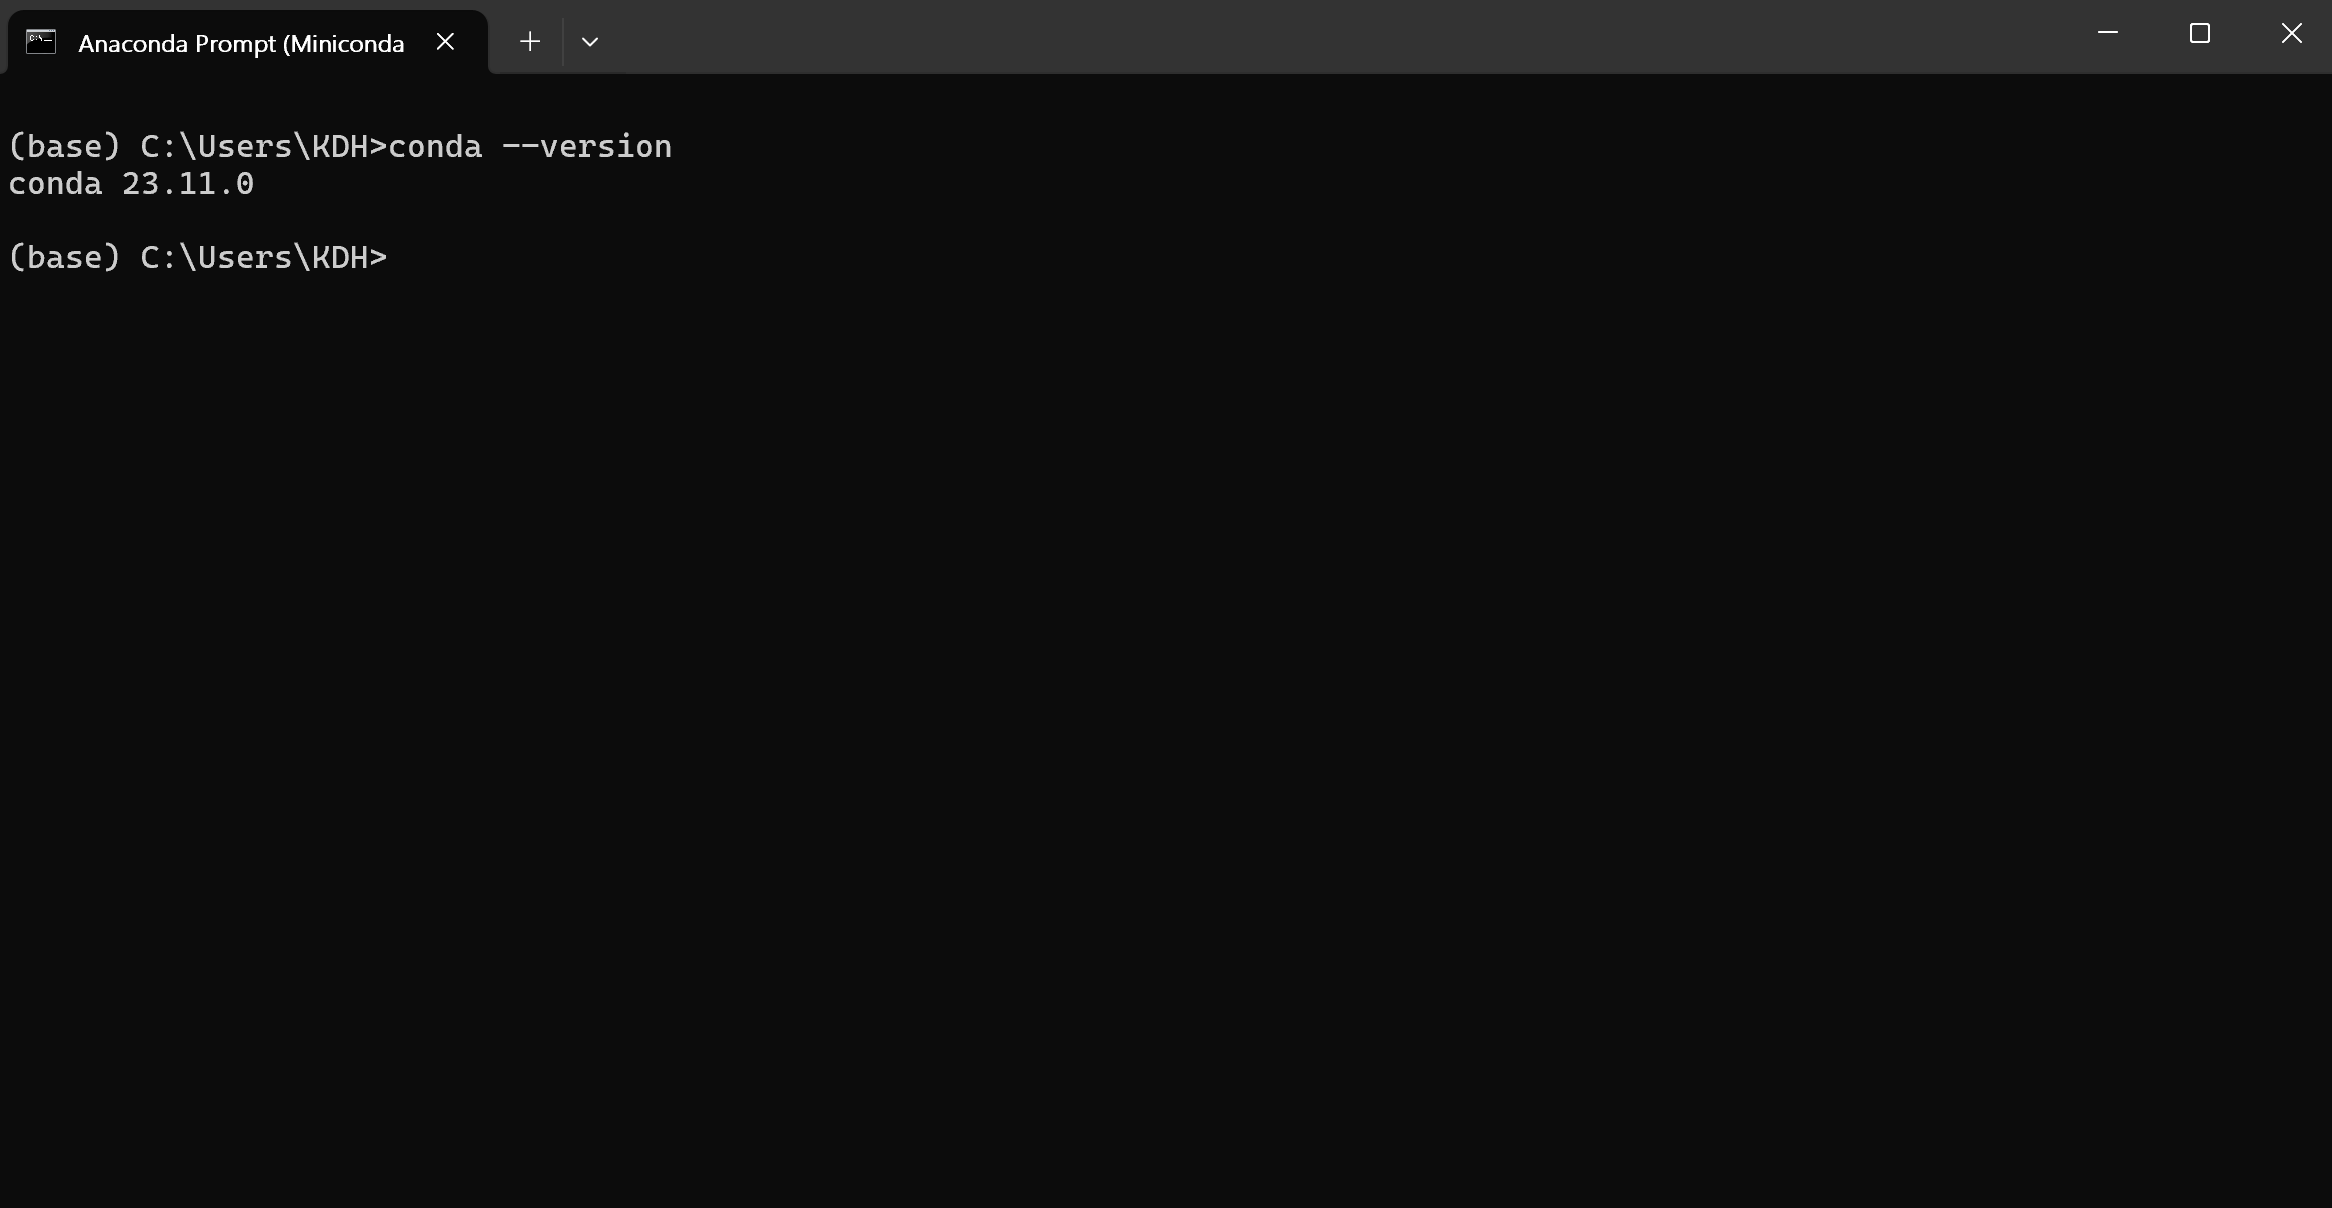
2. Anaconda prompt에 conda --version명령어를 입력해주면 버전을 확인할 수 있다.
3. 프롬프트에 conda update conda 명령어를 입력하면 최신 버전으로 업데이트할 수 있다.

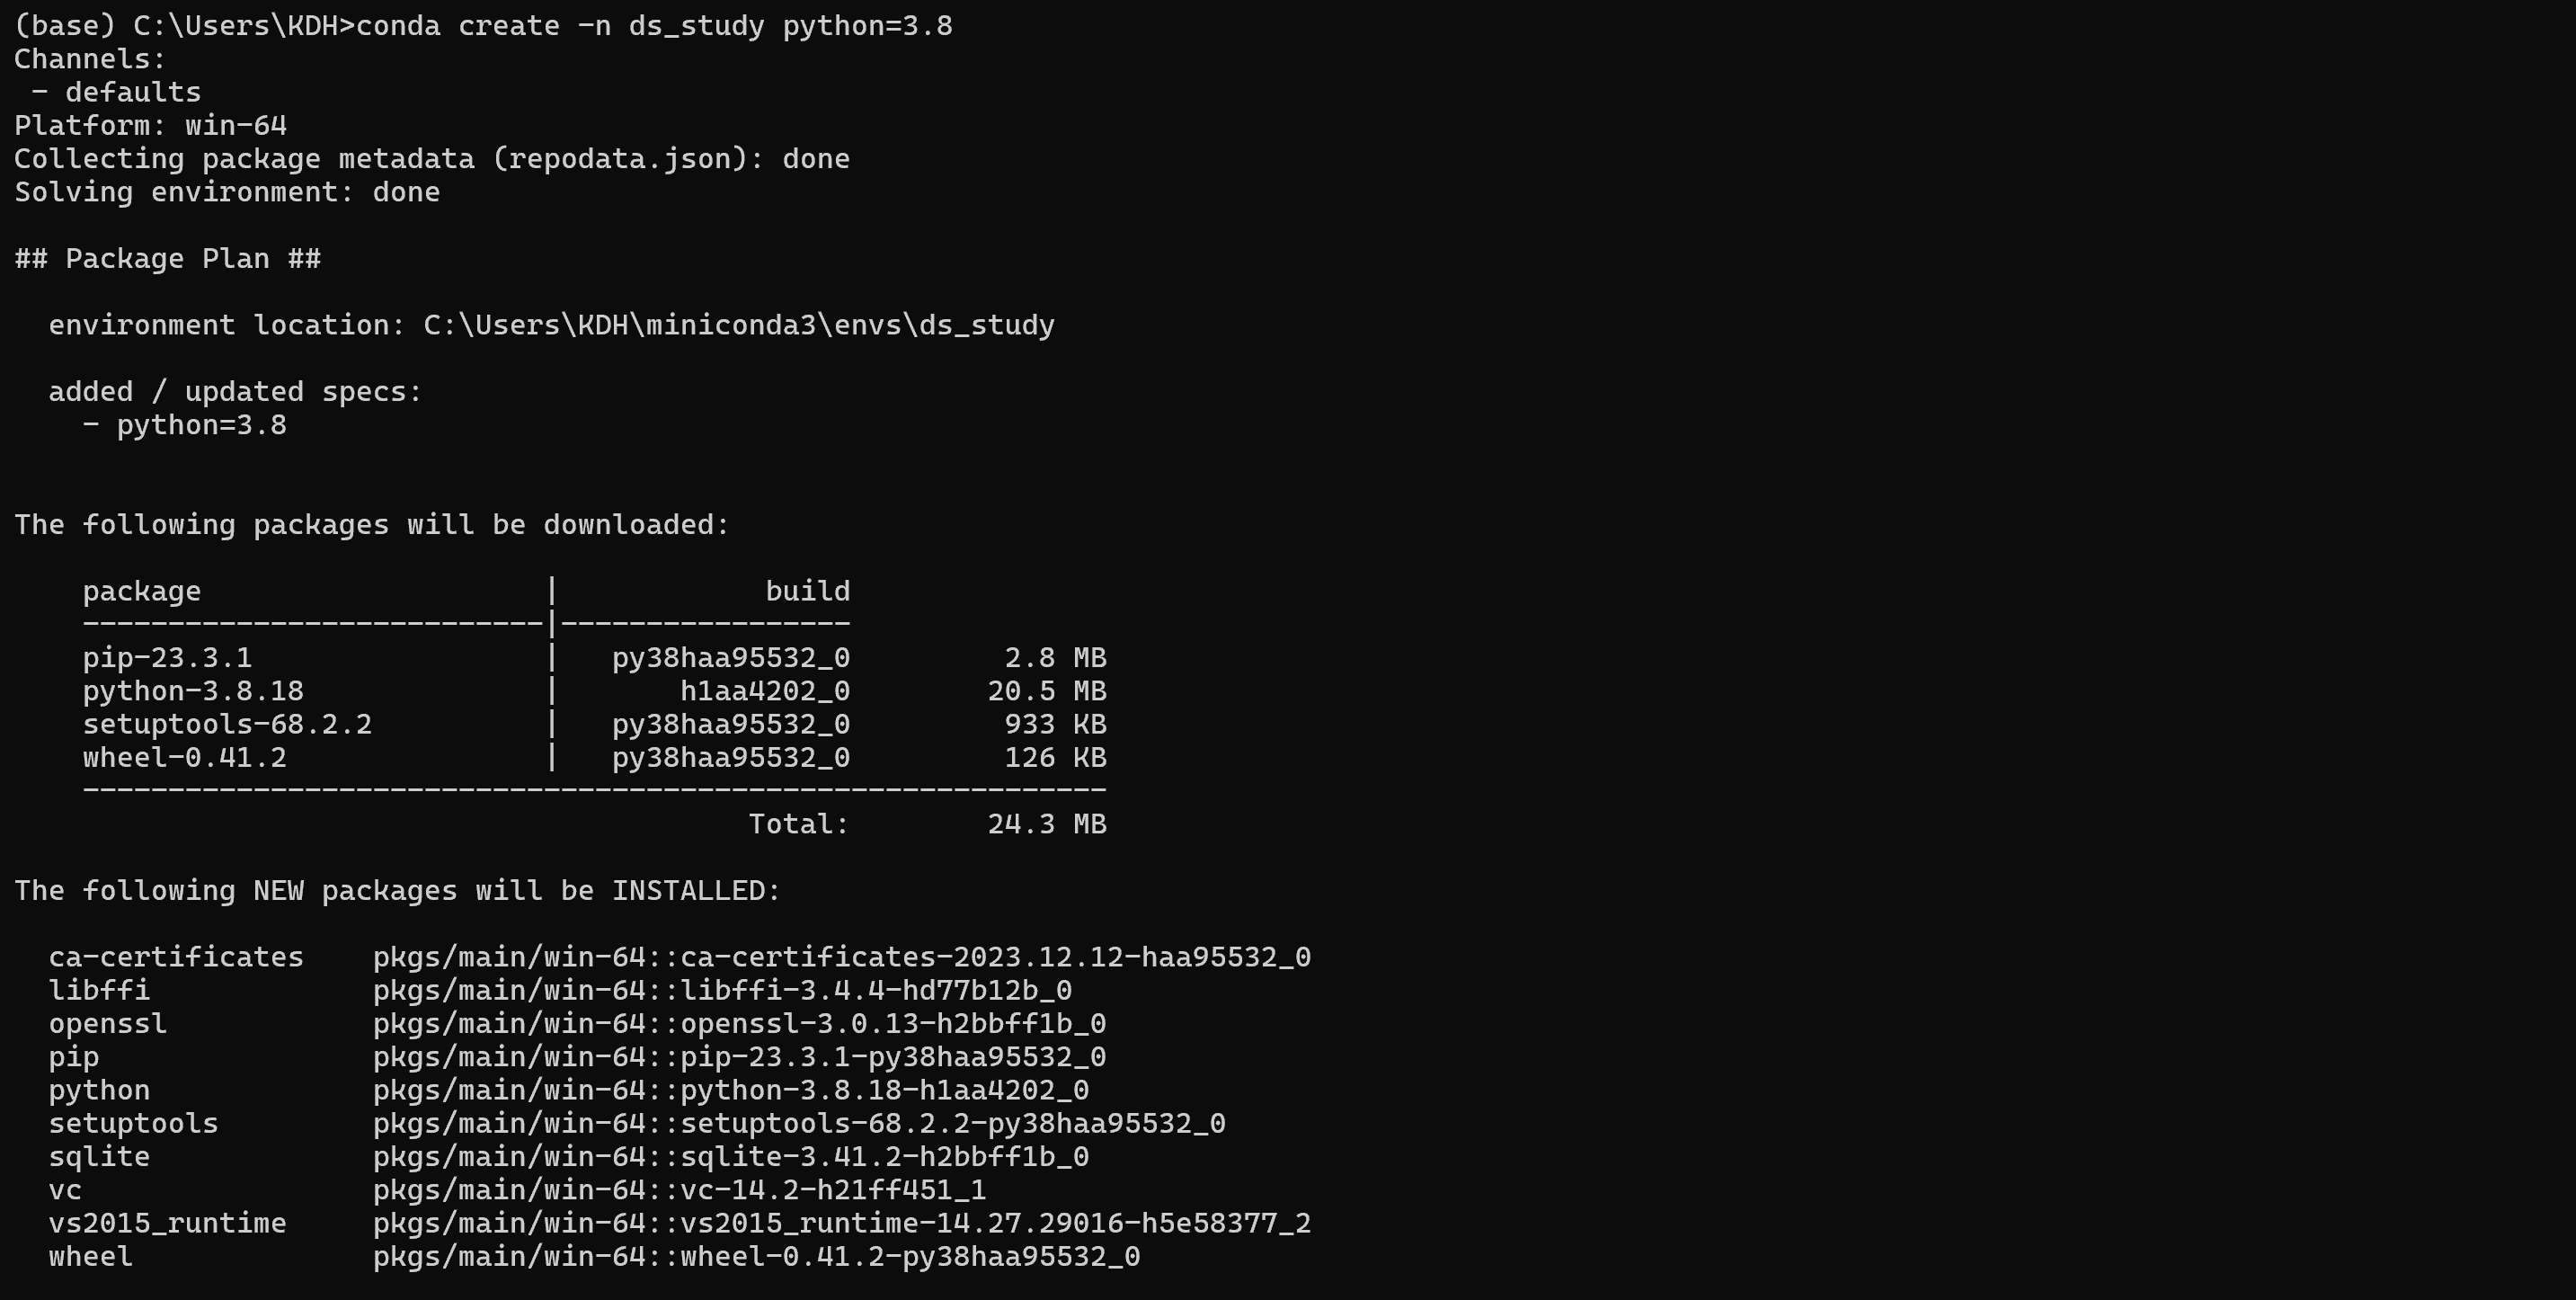
4. 작업을 위한 환경을 만들어준다. conda create -n ds_study python=3.8이라는 명령어를 입력하였다.
create -n 이후의 값은 프로젝트의 이름, 그 다음 공백문자 이후에는 파이썬 버젼을 입력해준다.
5. activate ds_study를 입력하면 아까 내가 정했던 ds_study라는 환경 내에서 아나콘다가 실행된다. base(기본)환경으로 돌아가고 싶다면 conda deactivate를 입력하면 된다. 여러개의 환경을 만들었을 경우, conda env list라는 명령어를 입력하면 지금까지 만들어진 환경이 프롬프트에 출력된다. 특정 환경을 삭제하고 싶다면 conda env remove -n ds_study처럼, conda env remove -n 뒤에 삭제하고 싶은 환경명을 입력하면 된다.

'데이터분석' 카테고리의 다른 글
| # 중급 03. List형 데이터 다루기 (6) | 2024.03.23 |
|---|---|
| # 중급 02. seaborn dataset(iris, anscombe) (2) | 2024.03.23 |
| # 중급 01. iterrows(), seaborn(기초, dataset(flights, tips) 활용) (4) | 2024.03.23 |
| 기초 03. matplotlib 한글 설정 (0) | 2024.03.02 |
| 기초 02. Jupyter notebook 설치(Windows) (0) | 2024.03.02 |